
2010-2024 Toyota 4Runner Gen 3 Dual Battery System
Description
Batteries Sold Separately: Group 25 Batteries Required
Upgrade Your 4Runner’s Electrical Capability
The 2010–2024 Toyota 4Runner Gen 3 Dual Battery System gives you a powerful, reliable electrical foundation for powering accessories without risking your cranking battery. Designed for demanding overland, off-road, and utility use, this system features our GEN 3 Power Hub, a precision-fit steel tray, and all hardware needed for a clean, professional installation.
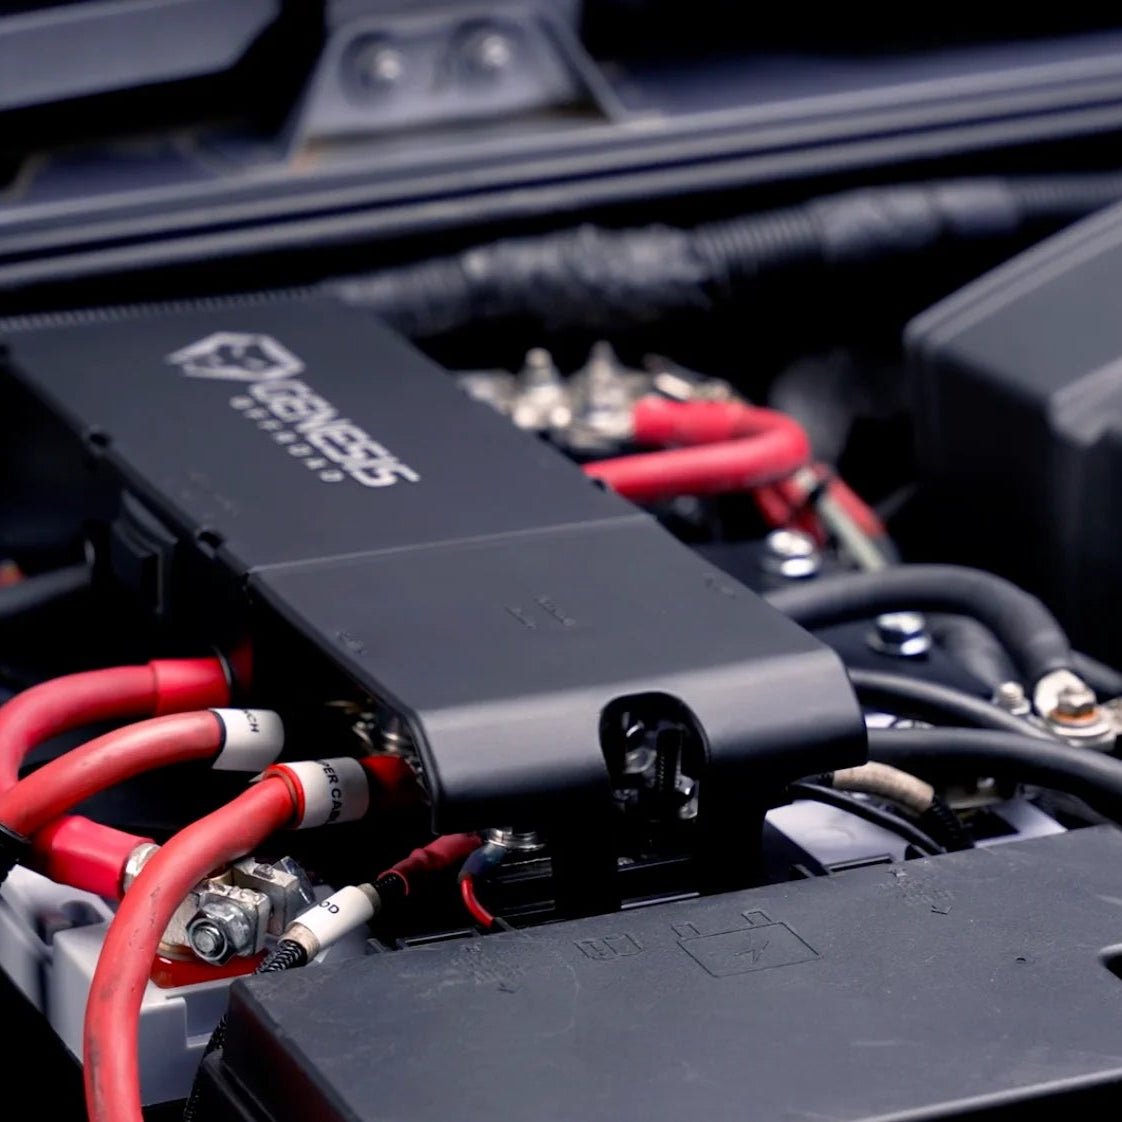
GEN 3 Power Hub
Take a closer look at the advanced Power Hub that sets this system apart.
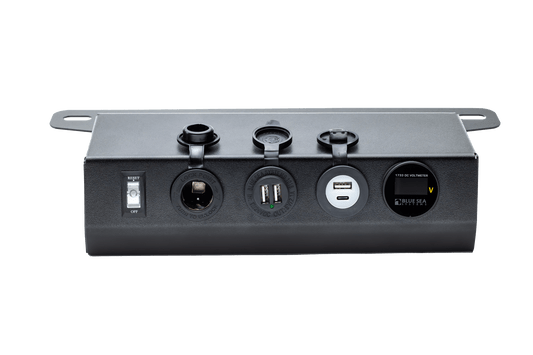
Bus Bars
- Simplifies the process of adding electrical accessories—connect winches, compressors, lighting, audio equipment, and more.
- Accessories run from the auxiliary battery, preventing accidental drain of your cranking battery.
- Features three stud sizes for heavy-gauge wiring: 3/8", 5/16", and 1/4", plus three #10 screws for smaller ring terminals.
Boost Switch Functions
- Auto: Automatically manages battery connection based on voltage levels.
- On: Manually connects both batteries—acts like jumper cables for starting the engine.
- Off: Keeps the batteries separated.
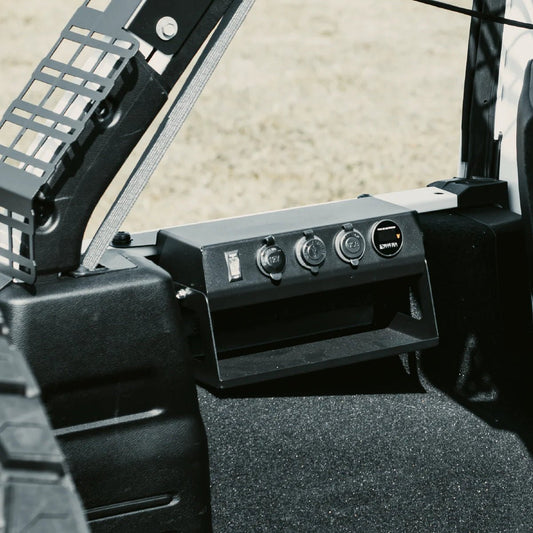
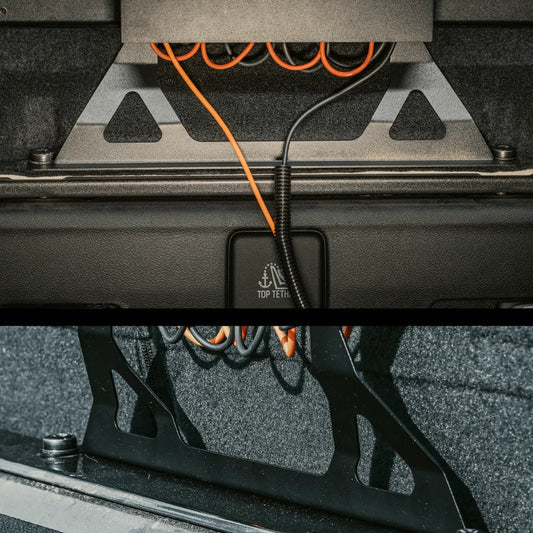
G Screen Port
Compatible with our optional G Screen Monitoring System—simply plug in a single cable to view voltage, connection status, and boost controls from inside the cab.
How It Works
A heavy-duty smart battery combiner automatically manages the relationship between your cranking and accessory batteries.
- At startup, the cranking battery charges first.
- Once charged, the system links both batteries so the alternator can charge them together.
- When voltage drops below ~12.7V for about one minute, the batteries separate.
Your accessories continue running from the auxiliary battery, ensuring the cranking battery remains protected.
Smart Combiner Specifications
- Rated for 300A continuous current flow.
- Handles 500A for up to 5 minutes and up to 2,000A for 5 seconds.
- Requires a minimum of 8V to operate.
- Consumes zero power to maintain battery connection and generates no heat during operation.
Battery Requirements
Matching Group 25 batteries are required. The factory battery is not compatible.
Bus Bar Details
- Positive and negative bus bars include 3/8", 5/16", and 1/4" studs for high-amperage accessories.
- Three #10 screws accommodate small-gauge, low-amp accessories such as LED lights or communications equipment.
Cable Construction
- Built from 2-gauge, high-strand-count pure copper welding cable.
- More flexible, more conductive, and more durable than standard battery cable.
- Pure copper, tin-plated lugs resist corrosion and ensure optimal conductivity.
- All terminals are sealed with thick, adhesive-lined heat shrink for long-term protection.
Installation Time
- Typical DIY installation: 2–3 hours using common tools and our step-by-step video guide.
- Professional installation: most shops bill approximately 2 hours on a stock vehicle.
- Add time if aftermarket wiring needs to be rerouted or cleaned up.
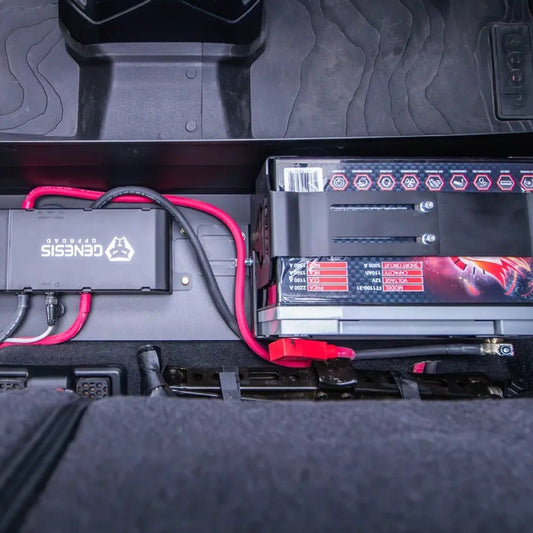
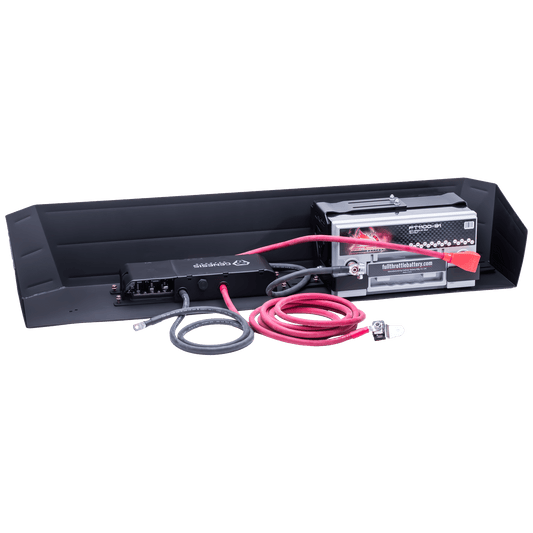
Included in the Box
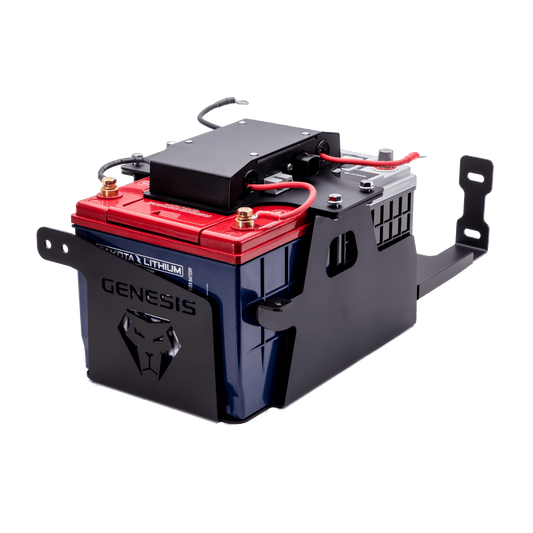
- GEN 3 Power Hub: Pre-wired, heavy-duty smart combiner for charging both batteries from the alternator.
- Steel Battery Tray: CNC laser-cut, precision-bent, and powder-coated for durability and perfect fit.
- Installation Hardware: All components required for a clean and secure installation.
Partner item — ships directly from Genesis Offroad
Description
Batteries Sold Separately: Group 25 Batteries Required
Upgrade Your 4Runner’s Electrical Capability
The 2010–2024 Toyota 4Runner Gen 3 Dual Battery System gives you a powerful, reliable electrical foundation for powering accessories without risking your cranking battery. Designed for demanding overland, off-road, and utility use, this system features our GEN 3 Power Hub, a precision-fit steel tray, and all hardware needed for a clean, professional installation.
GEN 3 Power Hub
Take a closer look at the advanced Power Hub that sets this system apart.
Bus Bars
- Simplifies the process of adding electrical accessories—connect winches, compressors, lighting, audio equipment, and more.
- Accessories run from the auxiliary battery, preventing accidental drain of your cranking battery.
- Features three stud sizes for heavy-gauge wiring: 3/8", 5/16", and 1/4", plus three #10 screws for smaller ring terminals.
Boost Switch Functions
- Auto: Automatically manages battery connection based on voltage levels.
- On: Manually connects both batteries—acts like jumper cables for starting the engine.
- Off: Keeps the batteries separated.
G Screen Port
Compatible with our optional G Screen Monitoring System—simply plug in a single cable to view voltage, connection status, and boost controls from inside the cab.
How It Works
A heavy-duty smart battery combiner automatically manages the relationship between your cranking and accessory batteries.
- At startup, the cranking battery charges first.
- Once charged, the system links both batteries so the alternator can charge them together.
- When voltage drops below ~12.7V for about one minute, the batteries separate.
Your accessories continue running from the auxiliary battery, ensuring the cranking battery remains protected.
Smart Combiner Specifications
- Rated for 300A continuous current flow.
- Handles 500A for up to 5 minutes and up to 2,000A for 5 seconds.
- Requires a minimum of 8V to operate.
- Consumes zero power to maintain battery connection and generates no heat during operation.
Battery Requirements
Matching Group 25 batteries are required. The factory battery is not compatible.
Bus Bar Details
- Positive and negative bus bars include 3/8", 5/16", and 1/4" studs for high-amperage accessories.
- Three #10 screws accommodate small-gauge, low-amp accessories such as LED lights or communications equipment.
Cable Construction
- Built from 2-gauge, high-strand-count pure copper welding cable.
- More flexible, more conductive, and more durable than standard battery cable.
- Pure copper, tin-plated lugs resist corrosion and ensure optimal conductivity.
- All terminals are sealed with thick, adhesive-lined heat shrink for long-term protection.
Installation Time
- Typical DIY installation: 2–3 hours using common tools and our step-by-step video guide.
- Professional installation: most shops bill approximately 2 hours on a stock vehicle.
- Add time if aftermarket wiring needs to be rerouted or cleaned up.
Included in the Box
- GEN 3 Power Hub: Pre-wired, heavy-duty smart combiner for charging both batteries from the alternator.
- Steel Battery Tray: CNC laser-cut, precision-bent, and powder-coated for durability and perfect fit.
- Installation Hardware: All components required for a clean and secure installation.
Partner item — ships directly from Genesis Offroad